Posts

Trim and Finishing Work
Image
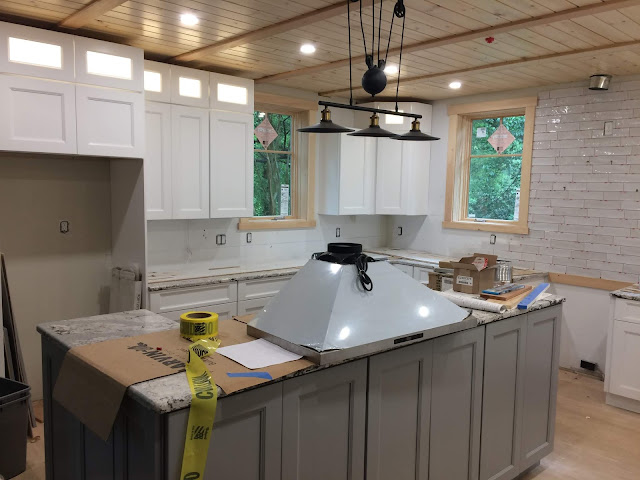
We're into the trim and finishing work stage now. The kitchen cabinets and counter tops are installed. (We're missing one cabinet, due to an ordering error, but it isn't going to delay us. Here is the kitchen at this phase, with the range hood sitting on the countertop. The subway tile backsplash is being installed on the far wall. Kitchen cabinets, countertop, and lights The stair railings have gone through a number of design iterations. We settled on a post and handrail design that allows the cable railing system to be tighten, compressing the handrails and toe molding. Here is a shot of the first two sections installed at the top of the stairs. There are a surprising number of cable railing system vendors. We decided to use the Feeney cable railing system, which is a bit more expensive than some of the alternatives, but provides a clean installation. The hand railings are at 41 inches, which we found to be a convenient height. Building codes in Maryland require the...
The Pace Accelerates

Image
We've made the transition from framing to finishing. The drywall is up and the painters have been at work. The number of things that can be done in parallel has increased and things are happening every day. The real stairs arrived and have been set in place, though we still have the 2x4 safety railings in place. We've been making selections and purchases on a regular basis. Tile for all the bathrooms, entry foyer, and kitchen has been delivered and the tile guy has been busy. The siding crew has been here on-and-off for the past two weeks. Everyone likes the color of the siding James Hardie Night Gray. The sun makes it difficult to see the real color in this shot. We'll get another picture in better light. The flooring was installed in about one day by a husband and wife team. She selected the pieces and laid them out on the floor and he  nailed them down. It was interesting to watch them work. The wood stove is shrouded in painters plastic to keep the pai...

Insulation, Drywall, and Siding

Image
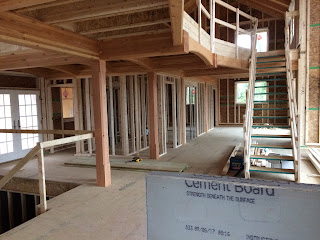
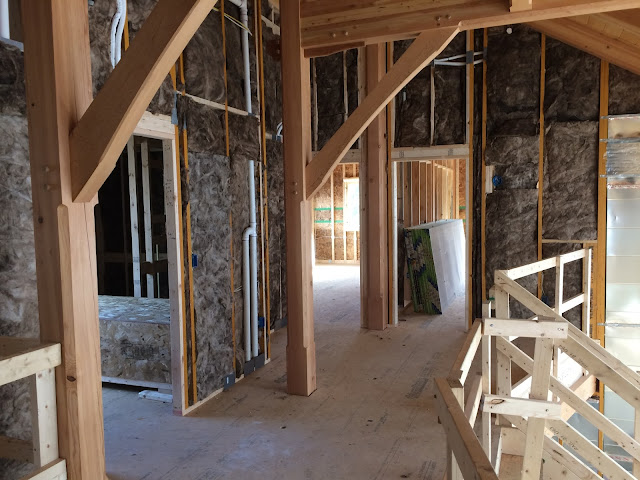
Insulation has been installed in the walls as a sound abatement measure, so we don't have the laundry competing with our current choice of music.  To the right are the railings and construction stairs that go down to the first floor. Rough-in Finished, Insulation Installed The orange, really tall wood in the loft walls are engineered studs. An engineered stud is made of layers of wood glued together, somewhat like plywood, only the wood grain is all the same direction. They are very expensive but they are straight, which is why we used them in the tall loft walls. We didn't want to have wavy drywall that might result from using regular lumber that bows. There is orange pipe in the upper right - that's the fire suppression sprinkler piping that is now required in houses here. The sprinkler is only intended to run for a few minutes to give the occupants time to escape. It isn't intended to stop a fire. The tall loft wall The drywall and finishing supplies have b...

Wood Stove, Framing, and Rough-in

Image
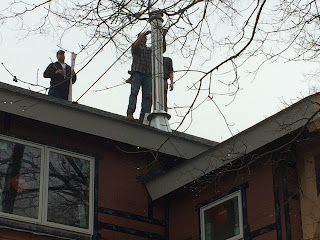
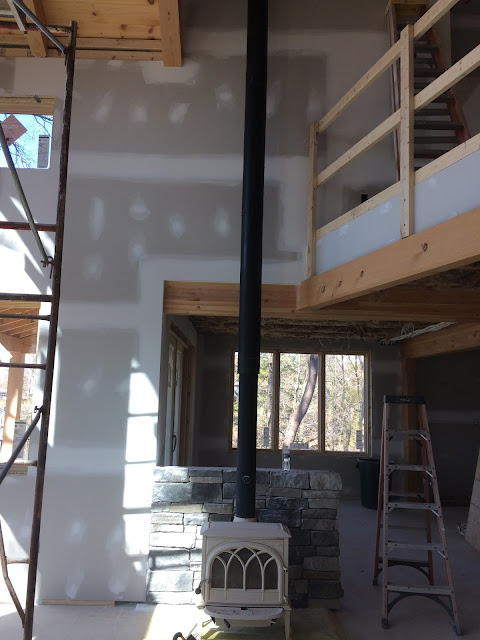
Things have been busy, with interior framing, rough-ins, and the wood stove installation. The last post showed creating the wood stove hearth. The masons have been here and finished the wall behind the wood stove. I moved the stove into place and cut the connector pipe for the fresh air intake. Bay Stoves supplied the stove pipe and did the install. I preferred that they climb up on the roof and work on the scaffolding to install the flue. Installing the exterior stove pipe Jotul 400 Wood Stove and Flue We did a good job of aligning the hearth, the wall, and the wood stove. Everything went together as it should. The flue goes straight up through the roof. It is about 25ft of flue, mostly double wall flue pipe. Only the first four foot section is single-wall stove pipe. The fresh air intake works great, preventing warm inside air from feeding the fire. It will also prevent the cool inside air from leaving the house in the summer. We have a big pile of scrap lumber and the woo...

Wood Stove Hearth

Image
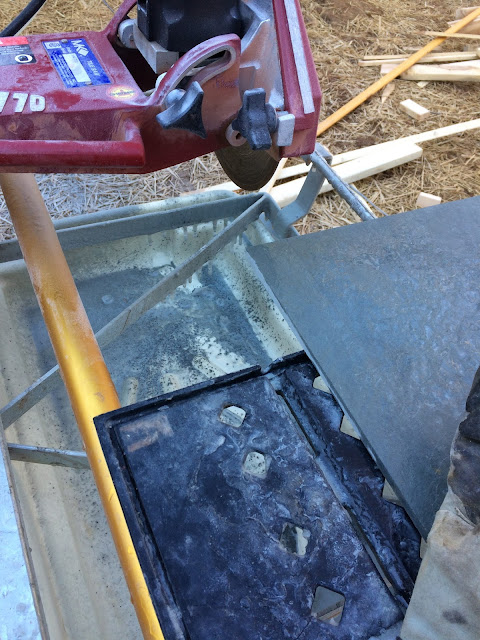
We've been working on the Jotul 400 wood stove hearth for several days. Since it will be very visible, it is taking a while to get everything just right. The stove manual says that the bottom heat shield allows us to just use a layer of non-combustible material under the stove. But we feel better by making a more heat-resistant hearth. The subflooring is 7/8 inch Advantech engineered oriented strand board (OSB). On top of that we glued 1/2 inch of Micore 300, a mineral fiber insulating product (R1.1 for the 1/2 inch). The next layer is 1/4 inch Durock fiber cement board, attached to the Micore with Versabond thin-set mortar applied with a 1/4 inch x 1/4 inch grid mortar trowel. We bought slate tile (real slate, not an engineered product) at Home Depot called Montauk Blue. They have it in several sizes. We needed both 12 inch square and 16 inch square to fit the hearth. We have a wet saw, which makes cutting tile a breeze. Well, today was a bit cooler than a breeze. The water that...

Crane Talk

Image
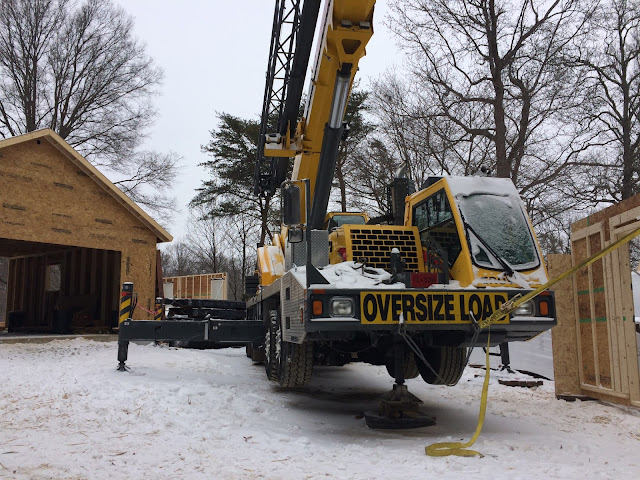
BWC rented a hydraulic truck crane for the house assembly from WO Grubb . They specified a 50 ton crane, but Grubb didn't have one available. Instead, they sent an 80 ton crane. It has five stabilizing pads, including one that's under the front of the truck. The counterweight consists of four big pieces of steel that weight 4000 or 6000 lb each. The crane looked very well maintained. We had two operators over the course of the 14 days of the crane operation, Mike and Charlie. They both were excellent. 80 Ton Crane The picture may not convey the size of the vehicle. On the side of the crane is a dimension chart. We had already used the crane dimensions to locate where the center pin would go, allowing for clearance of the counterweight to swing 360 degrees. This label also has lifting and counterweight information. Crane Dimensions I had done crane work in the past, but never with a boom crane, so there were some new hand signals to learn. For example, "Boom down,...

Working on the Interior

Image
With the building under roof, we shifted our attention to the interior by framing the interior walls. First Floor Framing Turning Empty Spaces... Into Framed Rooms We would like to get some heat into the structure, so Keith and I worked on the wood stove hearth and have it ready for tile, which has to be ordered. The wall behind the wood stove will be finished in the same stone that we're going to use around the entry and on the visible parts of the foundation. Technically, the hearth doesn't need anything other than a non-combustible surface if we use the heat shield. However, we feel better about using a 1/2 inch layer of Micore 300 on the subflooring, covered by a 1/4 inch layer of Durock fiber-cement board. Thin-set cement will hold the tile to the Durock. Wood Stove Hearth Underlayment We cut 45 degree angles on the hearth to eliminate the corner trip hazard. The hearth will be slightly higher than the surrounding floor, so we will frame the hearth...

Day 15 House Assembly

Image
Wednesday, 1/17/18 Today is the last day of the house assembly. The Bensonwood crew is finalizing all the sealing and doing a blower door test  ( DoE article on blower door tests ) to check for air leaks. The test uses a fan in a doorway to pull a vacuum on the house. We then walk around to feel and look for air leaks. A thermal camera may be useful when looking for leaks. We found two, which we quickly closed. Philip Sets Up Blower Door Test The blower door test was very successful. Bensonwood is known for tight buildings, with blower door tests that register less than 1 air change per hour at 50 pascals. (Pascals is a measure of pressure. 50 Pascals is .00725 psi, so it isn't very much pressure.) Our house registered .6 ACH50 (air changes per hour at 50 Pascals), which is the threshold for the  PassivHaus standard. (The actual measurement was 600 CFM50 at 50 Pascals, then the ACH50 figure was calculated, based on the interior volume. An interesting article about bl...

Day 14 House Assembly

Image
Tuesday, 1/16/18 Today will be busy. Roofers arrive at 7:30 (a bunch of them were there at 7am). The wood stove flue installer from Bay Stoves will arrive at 8am. The Bensonwood team will be replacing the compromised electrical wire that we discovered last night (see prior post). And the Lundberg team will be installing doors. (Unfortunately, my GoPro camera became unplugged from the big battery pack that supplies power all day. So I have a few hours of time lapse and didn't get all of the roofing or of the master bedroom door being set. I was a bit distracted this morning, with all the planned activity, and somehow missed that it had become unplugged or that I hadn't fully connected it when I installed it in the container at the end of my extension pole.) The roofers impressed everyone. They had a 46 square roof finished in less than a day. There must have been three or four teams working on the roof and another one or two fellows working around the edges to set the d...

Day 13 House Assembly

Monday, 1/15/18 Cold temperatures have returned, with the thermometer about 20F in the morning. It's hard to decide if it is better to be cold or better to walk around in sloppy, muddy conditions. Temperature about 30F is actually not too bad if we're properly dressed and it keeps our boots from getting muddy. Today was dedicated to getting the roof sealed. The Bensonwood team spent most of the day on the roof, installing screws, foaming the gaps between roof panels, and taping seams. The roofers arrive tomorrow morning about 7:30am and we need to be ready. At 5pm, I tested the four electrical wires for the fans in the four upstairs rooms and found one of them had ground shorted to black (hot). Not good. We quickly identified that a screw near the bottom (down roof) of one panel had penetrated the wire. We considered options and talked with some folks at Bensonwood. The resolution was to get a long electrical drill and an extension (they come in 5ft lengths) and drill a ho...

Day 12 House Assembly

Sunday, 1/14/18 We took the day off. It's been nearly two weeks of solid work, often in very cold conditions. It was time for a day of rest.

Day 11 House Assembly

Image
Saturday, 1/13/18 The rain stopped overnight, so we're able to get going with the crane again. Today, we fly all the porch parts into place. Some of the beams are of a size that we can handle by hand on the ground. But the porch roofs need the crane to handle safely. The GoPro camera that I use to record the time lapse videos didn't want to stay in one place and kept falling over, even if I clipped it to a tree. So I placed it on the front of the Genie boom lift to get a video of the screened porch roof assembly.  All the timbers are numbered and marked with an arrow to indicate their orientation for assembly. It is just like following the directions for assembling a big doll house ("tab A goes into slot B"). Porch Timbers with Identification Numbers (H5 and H6 in this case) Places where screws are used to tie timbers together are marked to identify the type and length of screw to use. Screws have also evolved. I'm familiar with lag screws, which are ...

Day 10 House Assembly

Friday, 1/12/18 Today was a literally a washout. It rained most of the day, sometimes rather hard. We had the roof on from yesterday, which helped. We were able to do some work inside. I think we all wound up pretty wet by the end of the day, with the high humidity, warm temperatures, and rain. The Bensonwood crew had arranged for the crane operator to skip today because of the rain. We wouldn't have been able to do much if he had been there. It would have been too dangerous to work on the roof in the rain. I didn't get any pictures today. How many people are interested in pictures of a bunch of wet construction workers?

Day 9 House Assembly

Image
Day 9 House Assembly (Thursday, 1/11/18) The roof panels went on today. Just in time for it to rain tomorrow. We also took advantage of the crane and the open roof to lift the claw foot tub into the second floor. At least we won't have to carry it up the stairs. I was able to get some time-lapse from both the driveway and the waterfront side of the house. In a few of the waterfront time lapse pictures you can see the use of come-a-longs to pull a panel in the right position. This is because everything is designed to fit tightly together, minimizing air leaks, which is one of the largest causes of high energy costs in a house. To help avoid air leakage, many seams are initially sealed with caulk and/or foam, then all seams are taped with Zip tape, a super-sticky tape (beats duct tape). The time lapse (below) shows Li taping some roof seams. Roof Panel Construction The roof panels are technically a Structural Insulated Panel (SIP). SIP construction consists of a l...

Day 8 House Assembly

Image
Day 8 of House Assembly (Wednesday, 1/10/18) We're now officially more than a week into the project. Progress is actually looking pretty good. The weather today was cloudy with temperatures in the mid 30s. By the end of the day, we had all the roof joists set and all the walls up. The last (and fifth) truck delivered the last of the Bensonwood order. Fortunately, the ground is still deeply frozen so the truck didn't get stuck. It has warmed up enough that there is now a thin layer of mud everywhere. But I think we all agree that dealing with some mud is better than the exceedingly low temperatures we experienced last week. There were many large parts in today's truck shipment, which required a bit of planning-on-the-fly to find a place to put everything. I moved the GoPro to the driveway side of the house today to get a view of the crane operation. Unfortunately, the wide angle camera lens makes everything look small. I couldn't safely get the camera any clos...